Pages

Wednesday, July 15, 2015

DIY String Art

My take on home decor goes a little something like this... ample storage meets minimalism.  I love mid-century and Scandinavian designs, especially when it comes to their take on clean lines, while still giving you that oh so familiar welcome home feeling.  Black, white, grays, and wood accents? Totally my go-to color palette.  It wasn't always this way, however.  It took a lot of stuff to get it right.  Finding your personal taste and style comes with practice and patience.  When we started this (slow and steady) home renovation journey, a lot of our pieces were hand-me-downs.  We went from shopping at Goodwill for couches and everything else used-- because it was what we could afford-- to only wanting new things to fill our home-- to finally marrying the two together.  We have been fortunate enough to afford some luxurious pieces, but at the same time, DIYing our way to making things more affordable for us.  The whole experience has been quite humbling, and it has also been great for character building.  Now, there are certainly stores that I could easily drop ten grand in without batting an eye, but with that non-existent budget to pull from, I can't imagine a day when that would happen.  Maybe after student loans?  Nah.  It took a few birthday's to wise up and realize that it is okay if a $2,500 couch isn't in your budget.  Maybe it will be someday, maybe it won't.  The point is, your space is yours and only yours.  No one but you will know how much you paid for your sofa table.  No one.  Probably a good idea if it stays that way too.  Seriously though, living within your means is an awesome thing.

I've also learned to be very picky, making a point to start purchasing certain pieces that I am in no way settling for. I've also mastered the art of discounts.  I never have, and probably never will pay full price for something, because why? Those extra bucks, whether it's $5.00 or $500.00 can go towards something much more important, like food. 

Lately, West Elm has been capturing my heart with their unique and clean designs.  I was browsing the artwork a few months back and came across this geo string wall art.  West Elm works closely with global artisans (pick me) to display their work in stores nationwide... so having the added perk of owning something pretty limited is kinda neat.

Credit: West Elm
I really like the look of it, don't you?  Now would be the perfect time to make my point after all of the rambling you read through.  There are certain things in life that a lot of people can do.  I am not trying to take credit away from the artist of this image, because frankly, this artist did something very motivating and inspiring for me.  They inspired me to dust off my art table and get to work.  I think this is a great jump off point that would allow anyone- artist or not- to experiment with some DIY art action, all the while maintaining a fixed budget.

What you will need:
  • Paper (I like Bristol) or a sheet of canvas
  • Ruler
  • Pencil
  • Thumb Tack
  • String of any kind (I like cross-stitch thread because of the colors and cost)
  • Needle
  • Frame
I think a big reason why this artwork is suitable for all ages and creative levels is because at some point during middle/high school, we learned how to cross-stitch.  This is really no different.  Except maybe cooler?  I don't know, my lady bug was pretty sweet though.

First, make a geometric design on your paper using your ruler.  If you choose circles, find something round your can trace.  


Once you have your outline done, it's time to make lines.  Lots of lines.  It's okay if you make a mistake, and your line isn't perfect.  Just re-draw it.  No need to erase either... you'll see.


Play around with geometric sizes too.  No, your triangles do not need to be the same size.

Once your lines have been created, grab your thumb take (or needle) and start poking small holes where your lines meet.


Now, the lines you created are going to serve as your guide.  You won't be seeing your pencil lines in the final product because you'll be flipping the image over.  When I first put my string through the hole, I like to make a little knot at the end of the string before it passes through the paper.  We all need a little security, right?  Start threading your picture starting on the back side (your line side). When you find your string getting a little short, tie off and tape, re-thread, and start again.


If you mess the pattern of your string up, there are two things you can do.  A. Go with the flow and keep on keeping on.  B. You can easily pull your threaded string through the holes without cutting it, and pick up where you left off before things got tangled.

Before long, you'll end up with something pretty cool.  Play around with shapes and colors.  Make as many or as few as you want.  I've been doing these little images as wedding gifts, using their wedding colors.  There is something about geometric shapes stitched together that is just so... unifying, similar to a marriage.


Thanks for stopping by.  Happy threading!

*J

Tuesday, July 14, 2015

DIY Portable Wood Pallet Table

Making a portable ottoman/coffee table for the outdoors is as easy as 1-2-3... and 4.  Literally, four steps.

1. First, get one of these-


2. Add some of these-


I used locking rubber casters.  You never know when that guy is going to come over.  The rubber wheel is a good way to protect your deck.  You can snag these locking casters from any home improvement store.  I picked mine up from Menards for $4.47 a piece, along with some double coated 2" deck screws.

3. Attach the casters.  *Tip, make sure your locking flap extends beyond your pallet so you can easy stomp your foot down to secure the wheel, you know, for when that guy comes around.


4. Flip over, stain it-- or don't; add some decor or a cushion on top and enjoy!


Beers anyone?

XO
Jenna

Thursday, July 9, 2015

DIY Patchwork Dresser

In the basement of WFMC you'll find me.  You'll also find some other crazy shit like dressers.

Man, did I feel for this dresser who was totally hating life.  They need loving homes too, so, I took him home.


First off, I scored big.  This dresser needed serious help, but it was made of solid wood.  I'm going to guess pine...?  It made the whole sanding off paint-stain-combo really easy.  In 30 minutes I had the dresser down to bare bones.  Secondly, this dresser has ten drawers.  Enough said.


After taking one look at this dresser I knew what I was going to do.  West Elm is one of my favorites, as I'm sure it is for a lot of people, but sometimes the prices are not so much.  I like the humor of their 'patchwork' furniture, but I'm all over here being cheap.  So, I would do what any cheap person would do and that is to make the dresser different, but same same.


After getting the sanding bit done, I primed and painted the frame of the dresser, letting the drawers free ball it for a bit.  My go-to white for a lot of furniture projects is White Dove by BM.  The white is pure enough, but it also gives off this milky appearance, making it look rich and creamy.


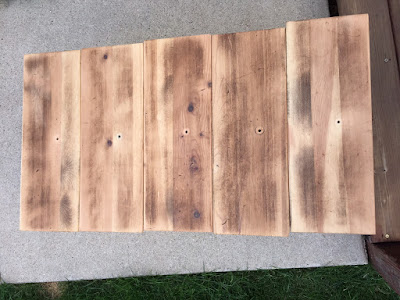
One thing that makes these patchwork dressers so unique is the variance of stains that are used.  As hard as I tried, the lightness of the wood could not illuminate a brighter shade as much as I sanded it. This meant some stain choices were totally out of the picture.  However, I was able to use this helpful guide from Panyl to come up with additional options.


If you're bored, I would totally recommend that you check out their site too.  Lots of valuable information in there, especially when it comes to modifying Ikea furniture.

Ten drawers should equal ten stains, right?  When you are dealing with so many shades, keep in mind that similar shades should stay far away from one another, therefore considering the placement of your drawers before proceeding is a must.

As you can see above, Panyl does something really awesome.  They have a color selector so you can visualize what the stains will look like when they are put together.  No more ah shit moments.


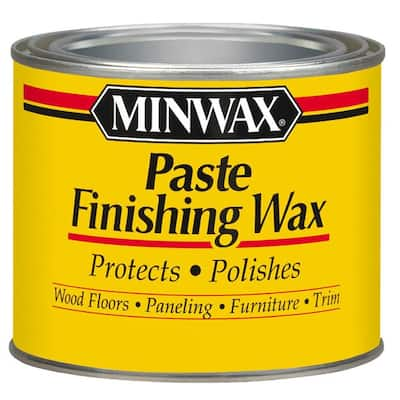
I choose Ebony (a clear favorite in our house), Driftwood, Gray, Puritan Pine, Gunstock, Red Chestnut, Dark Walnut and Jacobean by Minwax.  I ended up pairing certain drawers and used the same stain, just to give that "Patchwork" oddball feel.  To preserve the wood, I would recommend using a finishing wax to buff on your drawers.  Kids?  Dogs? Husbands?  No problem.  

Minwax 1 lbs. Paste Finishing Wax

The knobs and pulls make all the difference with patchwork dressers.  I've seen a lot of diversity when it comes to knobs on other DIY patchwork dressers.  What I have come to realize is I like things to be slightly off, but cohesive.  The price range of knobs and pulls can also make or break your budget.  I personally am a huge fan of brass.  You either love it, or leave it.  I think when it is done tastefully, it looks ah-may-zing.  My husband on the other hand is a leave it--get that crap outta here kind of guy.  He enjoys a good brushed nickel.  It's a classic, but not for this project, guys. 

I checked Myknobs.com, which is a great resource, if you know what you are looking for.  If you are unclear in anyway, the site can be really overwhelming with their 4,000 brass choices.  Lews/Lewis Dolin knobs are a favorite of many fellow bloggers out there.  Needless to say I was curious.


These Lewis Barrel Collection knobs will run you about $7.00 a piece.  I had a talking to my cheap ass and told myself to suck it up.  This dresser was worth it, dammit.  But I did what any thrifty gal would do-- I let them hang out in my shopping cart for a few weeks.  Today, after checking out the Lowes website, it turns out they have the exact same knobs for a fraction of the cost.  Purchased and done.  Awesome.

I was also in the market for a set of vintage tapered legs to add to the base of the dresser.  I checked out Etsy, and found that their prices for such things were a heck of a lot cheaper then going through some big box table leg store. I found a set of vintage 4" tapered legs to attach to the dresser, and paid under $35.00 with shipping.


I wanted the legs to match the dresser, so I primed and painted them using White Dove by BM.

Next up was attaching the legs.  I picked up four straight top leg plates and some steel hanger bolts from Menards for a few bucks.  Word to the wise- to avoid attaching hanger bolts to your legs, it isn't a bad idea to purchase ones that already have them.  If you really like a set of legs that do require bolts, it isn't hard to do, just not a lot of room for error.

To ensure that the legs would stay on, I had to build a frame on the bottom of the dresser and used 1 inch primed PDF boards to create the trim on the bottom for a bit more substance.

I filled the cracks in using my favorite, vinyl filler, and painted the trim to match the rest of the dresser. 


Cost Breakdown:
  • Seven Various Stains- $25.00
  • Four Legs- $34.00
  • Trim- Salvaged
  • Leg Plates and Bolts- $4.00
  • Dresser- Salvaged
  • Knobs- $45.00
___________________________
Total: $108.00 (give or take)


Here is the best part.  I saved $1191.00 not buying the West Elm version and... I have more drawers. Boom.  The end.