Pages

Showing posts with label Entryway. Show all posts

Thursday, March 16, 2017

Color Spotlight: Gray Owl

Is there is such thing as New Year's irresolution?  If so, I'm totally owning it.  I'll be honest when I say that even though I feel like I have been busy with home projects - they are the kind of projects that don't require a lot of skill, how to's, or shortcuts - and are probably not worth documenting, or your time.

We have a ton of projects on the back-burner, waiting for better weather.  A few include new windows, patio door, kitchen remodel, and a continuation of landscape updates from last year. Confident my plants decided to die and not come back this year, but only spring will tell.  This means, big bucks being spent.  It also means hanging around the house more saving for said bucks.

But...

With all of this time being spent in the house comes itches and scratches of wanting to do things that are more or less in my control.

For example: Repainting the upstairs for the fifth-ish time.  I've been sitting on the fact that I wanted to repaint everything upstairs for months now, but was waiting for the perfect opportunity.  I got that when Shane left for the weekend.  Husband is away, paint brush comes out to play.

Up until a couple weeks ago, we had a combination of Manchester Tan and Shaker Beige splashed across the main living area walls.  People change, style changes, preferences change.  I know I've mentioned in previous posts that the Manchester Tan was a paint color suggested by one of the specialists at Hirshfield's.  Although they are extremely knowledgeable, I was blindly asking a specialist what color to paint my living room, a place she had never been. Color of the year in 2010 was none other than Manchester Tan, so I can understand the suggestion.  However, just because it's a beloved tone, doesn't mean it's treasured in this piece of split.  Our windows face east and west, and in natural daylight, the color was tolerable.  But when the sun started setting, the color took on this I've been smoking three packs a day inside my house yellow.  Ishy.

Picking the color was a whole other battle.  I researched various colors starting in October, and just wrapped up painting in March.  The goal is to never paint our upstairs, like ever again.  After reading hundreds of thousands of reviews on cooler paint colors, I settled on Gray Owl.  Here is why:

Gray Owl Know-it-all:
  • Gray Owl is dominantly gray with cool, soft, and passive undertones of blue and green.  Which means, it looks badass with a variety of wood stains, stainless steel, and creams/whites.
  • Gray Owl is a light paint color - It's not light enough to be classified as an off-white, but it's also not a medium hue either.  In fact, it's right dab smack in the middle of "light."
  • With any light gray, it is susceptible to reflection and can pick up other tones from it's surrounding environment; i.e. If you have a navy accent wall, it's going to pick up the blue.  If you have a vintage forest green Chesterfield sofa, your walls are going to appear a bit on the green side.
** An added tip: Pair your Gray Owl walls with trim painted in Super White for a bright pop of freshness.  The two colors share similar undertones and go very well together.

As I was saying, we live in a typical split entry home.  For our home I used a combination of Eggshell and Flat finishes, and ended up purchasing 1 gallon and three quarts of Flat and 1 gallon of ES.  With this amount I was able to paint our downstairs and upstairs hallway, entry, living room, dining room and kitchen space.  Whatever color you're covering up plays a huge role in how much paint you're going to need.  If you have dark walls, double the amount.

Also, keep in mind that there is a huge difference between the two finishes - Eggshell has great wipe-ability with a bit of a sheen, so imperfections stand out a little more.  Flat is great for areas that don't have perfect walls - if your sheetrock is a little wonky, or if you live in a older home with plaster or a lot of imperfections from artwork being hung up over the years.

The way the house was painted with the two finishes was very strategic.  The two sheen's weren't mixed, except for one wall on accident.  You could see the eggshell punch through the flat.  Took a few coats to cover it up.

And without further adieu, a few before and afters of the back breaking work.  Don't worry, I'll pat my own back.

The best example can be seen in our entryway - and for the fact that I seem to have the most photos of our tiny entry?  For some reason?  It's best not to ask.

2015 ish after a new door and railing with Manchester Tan
As seen today with Gray Owl
No doubt do we have additional improvements to make - more things to hang - more things to paint. But if I had to pick any of these looks, I'd say I'll reveling in the best one yet.

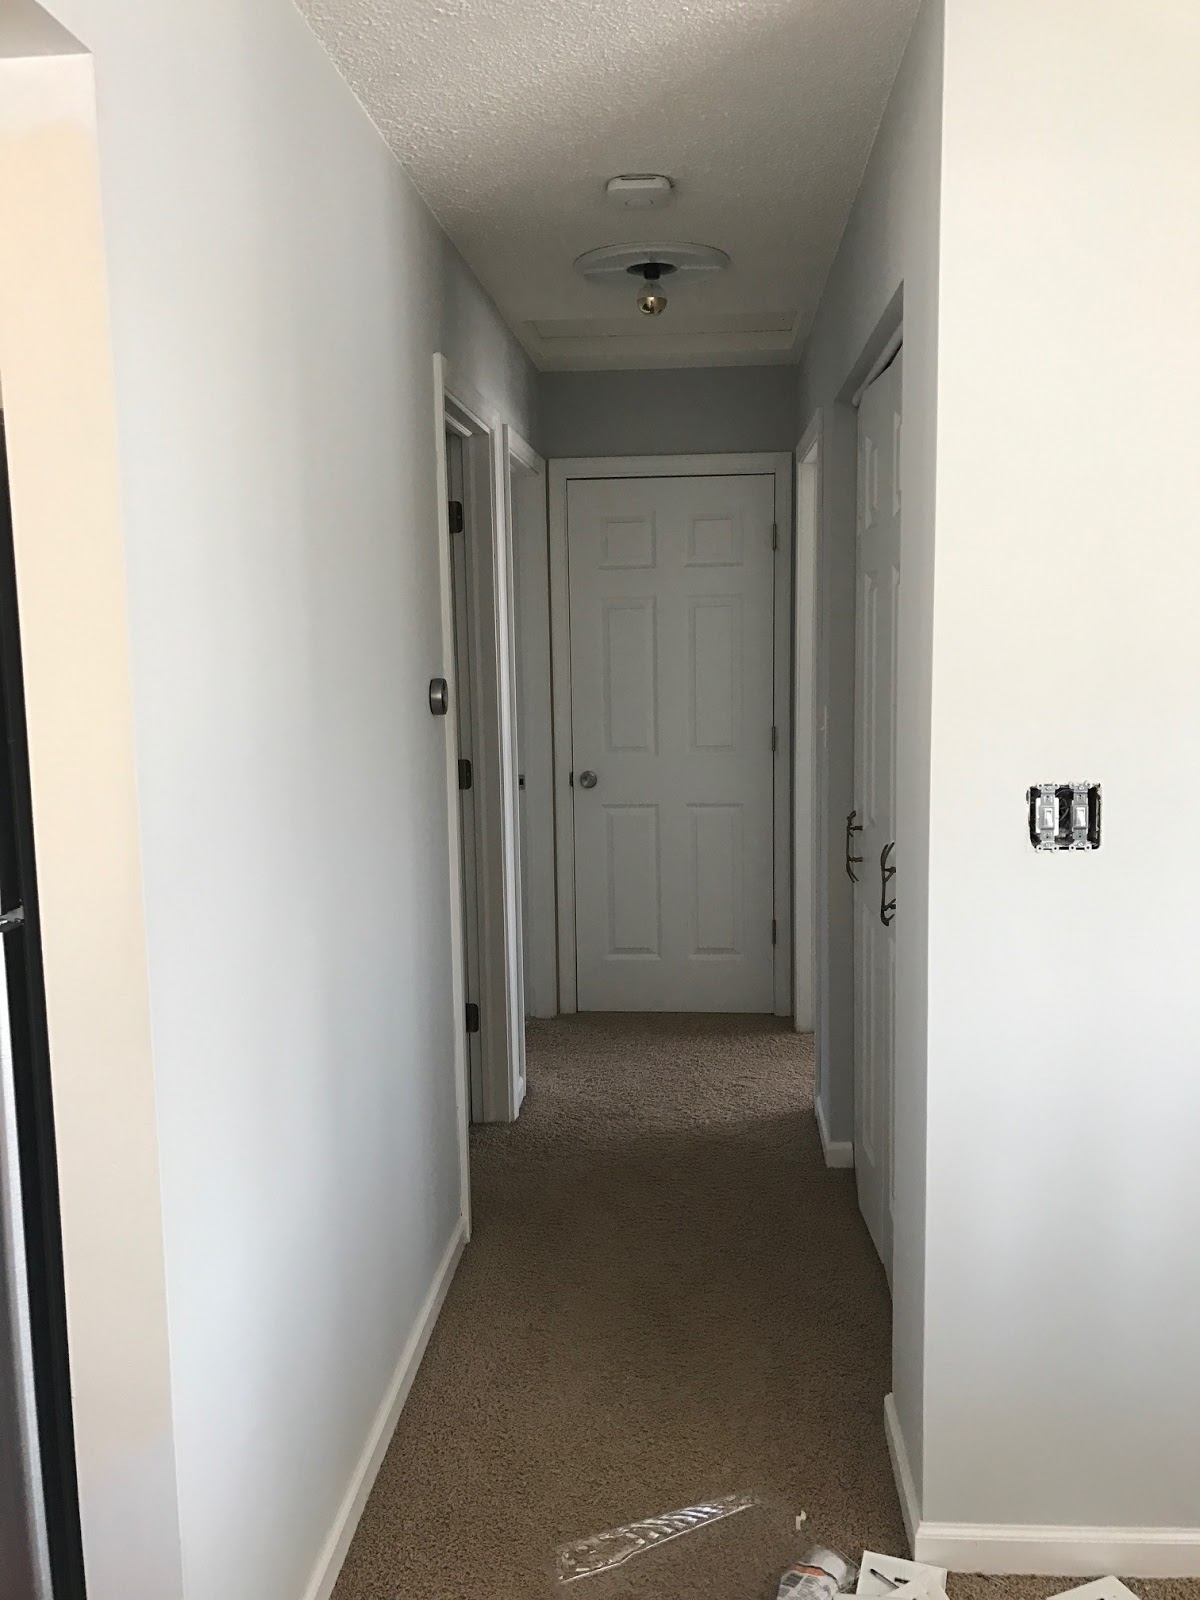
Another semi-decent example is our upstairs hallway.  Please disregard the areas I didn't paint when the photo was taken - on second thought, maybe you should take a look so you can compare the yellow dirtiness of the Manchester Tan to the so fresh and so clean, clean Gray Owl.


And finally, a shot of the faux fireplace - that also got a major overall!  (Check back soon for this update) You can easily compare the two paint colours.  **Photo taken in natural light


Well, I guess that's it as far as photos that capture the impending change.  I'm hopeful the frequency of these little posts change, but you can't rush a good thing.  As always, thanks for reading!

Tuesday, June 9, 2015

Stair Railing Make-Over

...still alive.

Many hugs and thank you's to those who continue to check back to see if we have our life together yet.

Recently I took on a new job, which means back to full-time status.  Ugh.  It also means our "extra" time is that much more valuable, therefore, the project wagon has not been as full lately.

I am here to share a couple fun updates though.  For any of you homeowners out there living in a "barely meeting code" home, like us, you sometimes wonder why it took you so long to fix/secure/replace something pretty sketchy.  Take our stair railing for example.  That thing wiggled and wobbled more than... oh... I'll just stop there.  I was convinced replacing the stair rail would be an easy fix.  For those of you who have replaced a newel post and railing, you probably understand how cray-cray my thoughts were.

Rewinding a bit, a few weeks ago we went to Gold Rush with some friends.  I had a 'Shane Approved' list to go off of, and an old newel post was listed in my top three.  I was expecting to find, oh, I dunno, like a dozen of these suckers?  Apparently, they are hard to come by.  You know that feeling you get when you spot a $10.00 bill on the ground?  Exact same feeling I had when I saw the only newel post in all of Gold Rush staring right back at me.  It was dirty and beautiful.  The dude was charging $45.00 FIRM.  He said he ripped it out of an old farm house in one of the Dakotas.  Price checking new newel posts at home improvement stores, they were more expensive, and not nearly as much girth.

Sold.

It took a few weeks, but we finally started making headway on the railing.  Simple enough to rip out the old railing, and replace it with the new, right?  Wrong.  What I failed to realize is the newel post is actually put in before the flooring, to ensure stability.  Not sure what went wrong hurr... but stability was not it's strong suit.

Plan B.

We ripped out the old railing system, trying to preserve the base stair thread (with the already drilled peg holes).  The stair thread got a good sanding, and a fresh coat of stain.  Next, we sawed the old newel post off, right at the base.  Instead of removing the old newel post, it was thin enough for us to create a slip with the new (old) newel post.  We carved out a square at the bottom of the new (old) newel post, and slipped it over the old craptastic one, and secured it using our nail gun.  Next, we primed and painted our new stair spindles Silky White by Behr.  I ended up picking up a low-profile stair handrail, and cut my own piece of wood to use as the rosette, staining it the same color as the thread base. Why low profile?  I really wanted the newel post from Gold Rush to be the focal point.

Chiseling a hole to use as a slip.
Providing extra security for the newel post

Yesterday evening we finally got around to securing the spindles to the stair handrail and to the stair thread.  We gave it a little shake and it hardly moved.  Vast improvement from what was there before.  I would trust that a whale could probably lean on it.... hmm.  Maybe.

For this project, we used a lot of Poplar wood.  I like the variation of the wood, and it tends to be a bit more forgiving as opposed to hardwood (ha) like oak.

And just for comparison sake, here is a before and after shot--

Now
2006
Pre-now 2015


My apologies.  I seemed to have disliked the old set-up enough for me to avoid capturing photos of it... but you get the gist of it.  Now to put our home back together again...  Tootles.

Monday, April 6, 2015

Entry Ledge/Handrail Project (for Free)


I hope everyone had a very happy Easter.  More importantly, I hope your children got over their sugar high's successfully.

The Easter bunny (Shane) was very good to us this weekend.  He got us a new Honda mower.  It's got a mulch-er on it and something else that makes it a big deal.  Whatever makes it cool, I am just thankful that it has four wheels as opposed to our other mower we don't like to talk about much.

The Easter bunny also gifted me a new toilet seat, as I shattered the other one, a bag of Cheetos, and most importantly, a new fricken front door!  !!!  !!!!   Oh, but no worries, there is another typical-Jenna disaster story where I found myself, once again, jumping the gun on house projects.

We also continued to work on our front entry redesign journey.  Anything to make a tiny space feel bigger, right?  Bonus-- it was a FREE project!

Once a year, for the past four years, I've made it a mission of mine to paint our front door a new color.  Not because I want to, but because I think the color I did paint it was a bad idea, so I cover up the bad idea with an even worse idea.  Our front door has made it through all of the primary colors. Yellow was terrible, but it was by far my favorite.  Shane's favorite was blue.  The blue door was one of the few projects that Shane came home to and liked immediately... then I decide to cover it up. What a bone-headed move.
Yellow

Blue Door-- Thanks Google
                                     
Red-- the door I never cared to finish, or show off

On Saturday I was hell-bent on getting some project ideas off of paper and into my life.  This door was one of them, and it didn't have a chance.

The issues with this door was A. It melts/melted.  The glue behind the window-lite trim got so hot that it started oozing out from the cracks.  I thought that a replacement window would be about $50.00 or so bucks, and readily available at my home improvement store (wrong and wrong), so without much more thought, I took out the window, which literally disintegrated in my hands, and went to town on stripping three layers of paint off the door just so I could repaint it a "permanent" color.  Three hours later, the paint was off, and the old "wood" door was unveiled.  Now for that window.  A replacement single window-lite will run you around $138.00.  A new door will cost you around $192.00.  Unless you really love your door in it's current state, I'd say go for the new door.  Don't be like me and hang out with a broken door for three hours before doing your research.  It's.not.worth.it.  All that work and we didn't even keep the damn thing.  The silver-lining?  I found out which stripper I would recommend to anyone looking for a quick fix.  She's fast, smells o.k. and gets everything off.  


Just for the sake of science, I'll show you what this stripper can do--


This stuff ain't messin' around.  Wear some heavy duty rubber gloves whenever you are dealing with these kind of chemicals.

Here is a quick snap shot of the window we took out.  Like I said before, if you really love your door, but aren't a fan of your window, all you have to do is take the screws out and the window should come out with ease.  Make sure you measure the depth, as some replacement windows vary between 1/2-1 inch thickness.


Stop by for a decent post of our new door too.  Exciting things people, exciting things!

Project Round 2: Fight

The next project on my to-do list was fixing the aesthetics of our handrail and ledge in our entryway. Here is a before shot:


I sanded and stained the wood once before, but the bright oak color really isn't our thing.  We prefer the dark looking wood with white accents.  Please excuse our super gross looking entryway in this photo.  Fall in Minnesota is lovely but dang messy.  The issue I was having with the handrail and ledge were issues that only I would notice.  There was paint splashed up on the quarter rounds, and paint streaks hidden under the handrail.  Not all of it was my fault.  We are confident that the previous homeowners gave up and didn't see the potential in this house that we do.  Then again, we're I'm crazy.

We had lots of leftover material from our basement reno, so lucky for us, this project didn't cost us a cent.  It is such a good feeling utilizing leftovers, because then you know you are getting the most bang for your buck. 

At 8:00 in the morning I took of the handrail and began sanding it outside.  A mighty fine wake up call for our neighbors might I add.  After a little pounding inside, the ledge came off with ease.


I stained the handrail using Minwax in Ebony.  I didn't want the color to be super saturated, so I wiped off the excess using a clean rag.  Once the new ledge and quarter rounds were installed, I used a tube of vinyl magic to fill in any cracks.  This may seem like an unnecessary step, but it completes the project, and makes it look like the ledge and all of it's trimming are one single unit, giving off a much more rich appearance.  The reason for vinyl filler?  It doesn't crack with Minnesota's changing temperatures, and it's going with the flow attitude adapts itself as your home settles.  When the filler is still wet, run your finger along the thin strip to smooth it out.  Sand any abrasive surfaces for a smooth finish.


I really think this quick project certainly classed up our entryway, making it a bit more modern. There are certainly bigger projects (getting rid of the carpet and tile and replacing it with hardwood) that need to be done, but for the moment, I have really been enjoying the new look of our entryway ledge and handrail.  One small step at a time.


Because what is a post without a side by side comparison:


I am really starting to love this piece of split.  Thanks for stopping by! XO.

**UPDATE**

Just wanted to share an update on the looks of our front door--interior side.  The struggle has been real trying to figure out what to do with the trim and new door color.  If any of your bloggers/designers out there have any suggestions, please, we are all ears.  Until then, the white will do.