Pages

Friday, December 19, 2014

Painted Pillow Swag on a Budget

If my life was measured in pillows, I'd be winning.  It's seriously nutty how many throw pillows I have.  I would also hate to admit how much I paid for those said pillows.  The issue?  I am a sucker for change.  It's okay though, guys!  I finally found the solution.


... Ikea pillow covers.  Bet you saw that one coming.  I am slowly finding "our" style in our home.  Sometimes it is easy to forget that there is a boy living under the same roof, so I am trying to be consciences of that too. Needless to say, there has been a lot of trial and error... and turmoil?  Hm.  Sounds about right. I am quickly drawing the conclusion that I don't have an exact style-- I just like what I like.

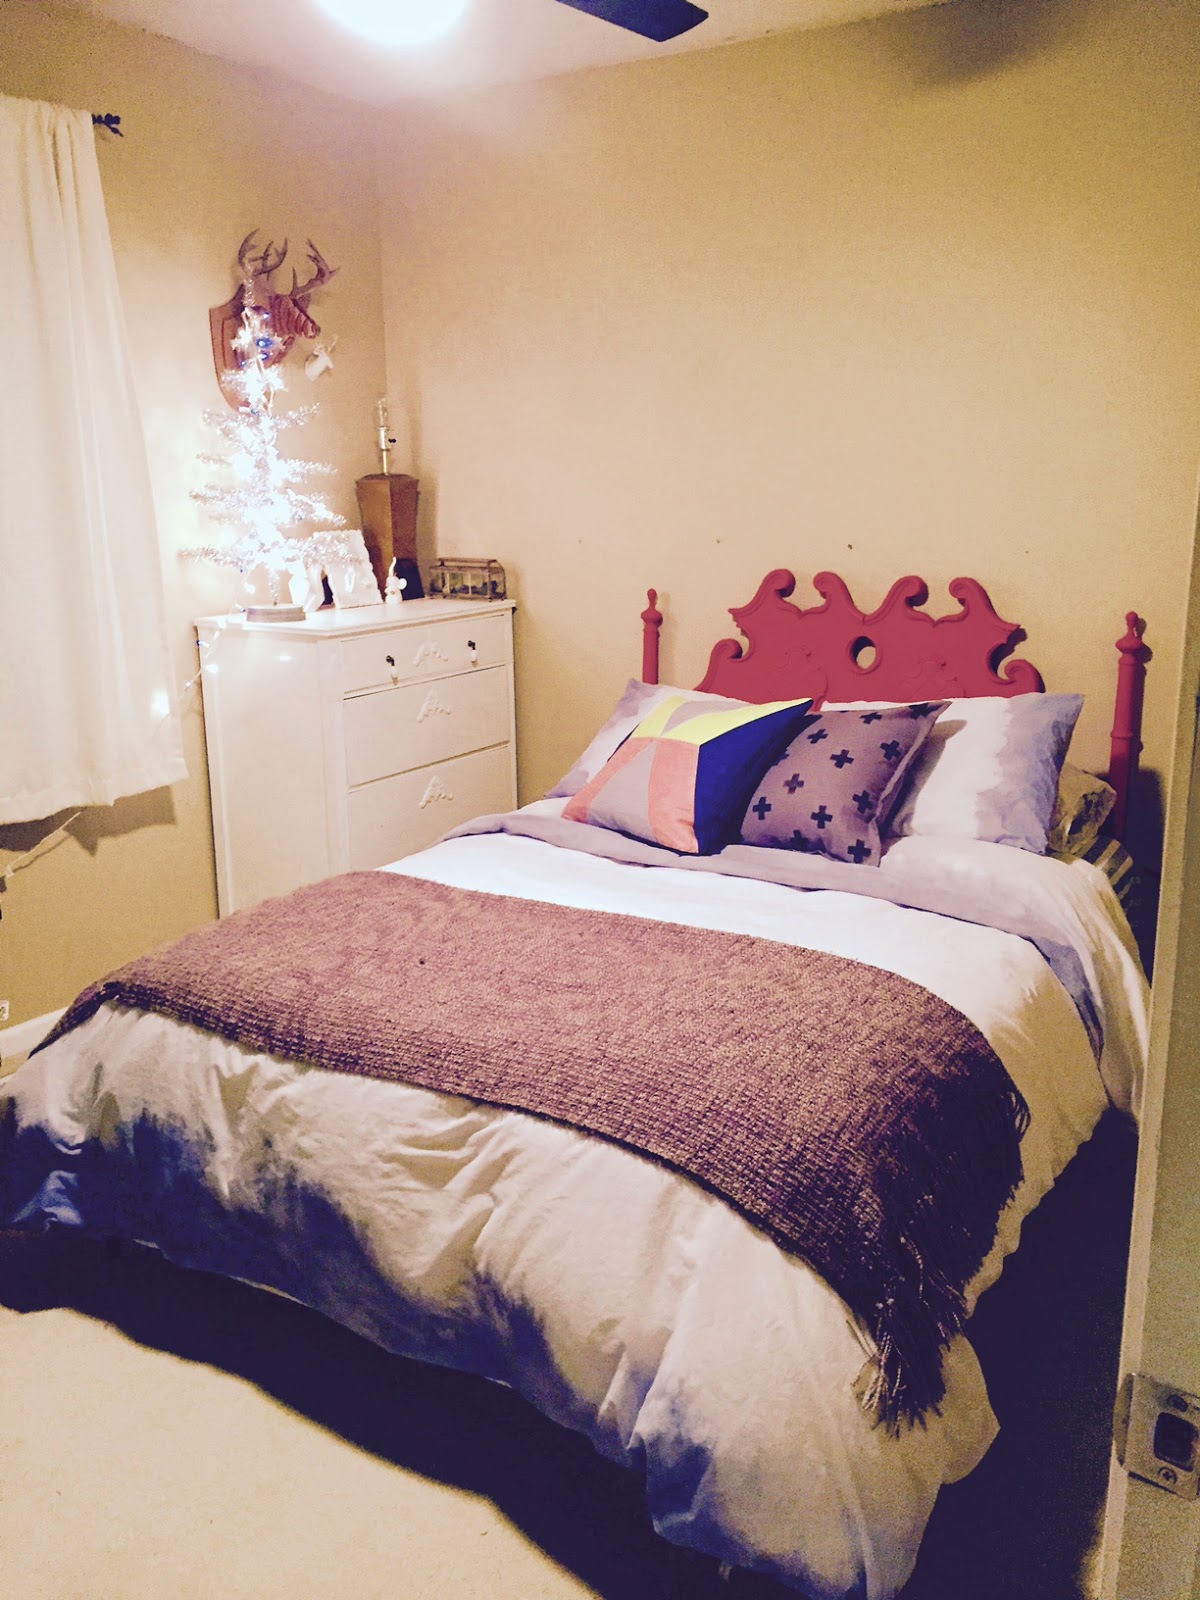
For starters I picked up a couple Gurli cushion covers from Ikea ($4.00 a pop), and their down inner cushion inserts ($6.99 each).  I've really been drawn to geometric shapes, not to mention the Swiss cross, therefore, that pattern was a given.


I picked up some fabric paint made by Tulip @ JoAnn fabrics.  Check out their Soft line.  It is ideal for these type of projects.  Next, I grabbed a mail flyer and cut my pattern into it.  Also known as the poor man stencil, make sure your paper is pretty thick.  We aren't looking for soggy here.


Before you begin, it is never a bad idea to iron your pillow cover.  You'll at least want to flatten the deep wrinkles.  For my pattern, I eyeballed it.  I love the idea of something being slightly imperfect.  Use your paintbrush or foam brush (both will work) and blot the area.


Move your stencil to another section and start again.  Keep going until you think you got it just right. Then, order a Topper's pizza and eat it.


Here is another quick pattern I did for reference.  I just used some tape and filled in the center with gold paint.  The options are seriously endless.  From simple to complex, you can do it all.


After a little drying time, you end up with some pretty cool ass pillows.


Dip Dying a Duvet Cover

Good morning boys and girls.  Today I am going to teach you how to dye a duvet cover.  Ready?  Okay, let's go!

Materials you may want to favor:
  • Latex/latex free/rubber gloves
  • A white duvet of your choosing ($29.99 @ Target)
  • Large glass bowl or plastic tote
  • Rit Dye (feel free to mix colors)
  • Salt (add one cup of salt for cotton based products)
  • Water
  • 1 tablespoon liquid laundry detergent (I used Woolite)
  • 30-40 minutes of your time
When I began this process, I didn't necessarily know what kind of look I was going for.  I found a couple images online of similar duvets for HUNDREDS OF DOLLARS. No!  I won't do it.


First off, follow the instructions on your Rit package or bottle.  I picked navy blue because, well, I liked it.


For larger projects you may want to use a large plastic tote of your choosing.  This is something that I probably should have done, but didn't feel like venturing outside in the garage to look for one.  Why? Because it is winter time in Minnesota.


I mixed my solution in my sink.  If you get a little (or a lot) of dye in/on your sink, don't cry.  Use a Magic Eraser. That shit works on everything.  Oh, and glove up.


To make sure the dye got where I wanted it to, I used a wooden spoon that I don't plan on using again.  You may want to consider picking out your own tool where you won't get devastated if ruined.


Once the duvet soaks up the dye-- I alternated times between sections to give the colors varying depth-- give it a good rinse, and hang dry what you can.  I may have made the mistake of putting the duvet through the washing machine, followed by the dryer.  I think the outcome was pretty cool, kind of this soft cloud effect.  I guess it goes to show you that there is no wrong way of doing it.  However, if you are seeking bright, vibrant hues, skip the washing machine.


For one of the first dying projects I've done, I like it... but I don't love it.  It may just be a bit too muted for me.  The nice thing about doing these kind of projects is, if it isn't perfect the first time, you can always try again.  Hello weekend plans.


Friday, December 12, 2014

This Can't Be Our House. It Just Can't Be.

...because people are always curious about before and after images, (I am so guilty of this) I thought it would be fun to show you what our house looked like the day we bought it.  The only issue is, we couldn't afford a camera back then, and cellphone pictures?  Well, let's just say my Verizon Chocolate (first generation), wasn't capable of great quality photos... er.. maybe it was me that wasn't capable and didn't know how to take pictures?  Either way.  Didn't happen.

So, then I Googled our address...

Living Room
Basement View #1
Dining
Basement View # 2
"Master" Bedroom (REDRUM)
Downstairs Bathroom
Kitchen
Upstairs Guest Room
Deck
:-/

Although major improvements are still making headway in our house... looking at these photos gives me a good idea as to why I was hell bent on changing it up in there.  So... boring.  So typical.  So ugly.

It is easy for me to get all hot and bothered about projects getting put on the back burner-- when they need to be done LIKE RIGHT NOW.  But I think it is safe to say that, comparing the before's, after's and the in progress photos, our home looks nothing like this anymore.  Nothing.  Thank God.

Conclusion:  I fricken love Google.  High five.

... and just for comparison sake, let's take a look at some of these "transition" photos.

2006... Oh the horror 
Early 2014
Now
2006...

Now
2006...
2012
Now(ish)
2006
Early 2014
2006
Now
I know I am WAY BEHIND on getting updated photos of our remodel(s)... but you know how it goes. Crossing my fingers that it might actually happen kinda soon.  Now, what are you waiting for? If it's broke... go fix it.